
If you have been by the shoppe recently, you know we are all ready for the sweetest day on the calendar...Valentines Day!

I found a tutorial for these adorable Valentine Envelopes on Lucykate Crafts blog. A fantastic and creative blog! You can find her tutorial here.....http://lucykatecrafts.blogspot.com/2009/02/love-letter-for-valentine-tutorial-and.html
Because I was making so many envelopes for the shoppe window, I tweaked the process a bit.
Here is how to make them as I did for the shoppe window.
To begin, I printed out Lucykate's pattern and enlarged it so instead of 11cm across - mine is 5.25 inches or 13 cm across. You may adjust this to the size you would like.
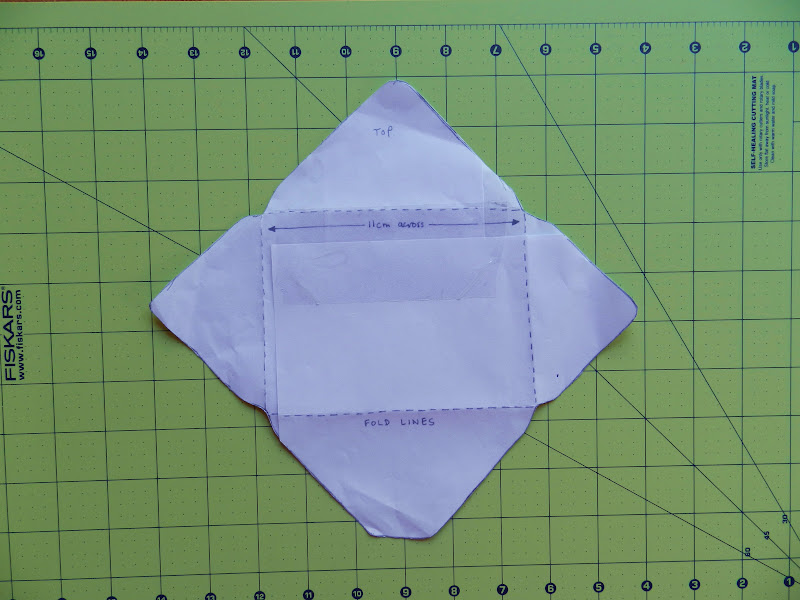
You will need two pieces of fabric. If you are using a directional fabric, cut your pieces 10 1/2 inches by 10 1/2 inches. You will need a bit larger piece for a directional fabric because you will need to cut it on point {just as the template appears in the picture above}.
If you are not using a directional fabric you can turn the template so it is more of a square shape and that will save some space - so you only need a square that is 8 1/2 inches by 8 1/2 inches. Of course, adjust your fabric squares for the template size you are using. Just cut a square slightly larger than the template.

One piece of fabric is for the outside and one piece for the lining. I specifically wanted to use this new Lecien fabric we have in the shoppe. It has a wonderful swag trim that is just precious.
You will also need a slightly smaller piece of wonder under or steam a seam.

Iron the fusible web onto the wrong side of the outside fabric. Use a hot, dry iron to fuse the webbing to the fabric.

Place the template on top of the wonder-under and trace around the template.

Cut out the design on the traced line and peel the paper from the back to expose the fusible web.

Now press the shape with the webbing to the lining fabric {again with a hot, dry iron} . This will fuse the lining and the outside fabric together.

Again cut along the edge of the envelope design. Fold the flaps in and press {steam may be useful now}. You will see an envelope shape emerge.

For the shoppe window I didn't bother to fold and press the top flap because I wanted the cards tucked inside to be seen. But you may want to press the top flap so that it can be used as an envelope on a package or to hold a special letter :)
Next I decorated the outside of the envelope with just some straight stitches and perle cotton.

I simply stitched about 1/4 inch from the edge of the envelope all the way around.

I chose to glue the flaps of my envelope down - just where they overlap and not the top flap. You want to take care with this step that the envelope opening is not glued shut. Just a bit of glue along the edges where the front flaps overlap.

I am using Martha Stewarts Gel Glue with the spongy applicator tip. Any tacky glue or fabric glue will do.
To finish my Valentine envelope, I added a heart stamp to the address side. I cut the heart free-hand then stitched and, again, glued it to the envelope.

You may want to add a clever address label!
For a closure I stitched a vintage button and a loop for wrapping around the button to close.

For the shoppe window, I tucked stamped cards with sweet sayings inside the envelopes. But you might want to create loving coupons for your special someone....maybe a coupon worth one 'neck massage' or 'your favorite dinner'.
Have fun and Happy Valentines Day!!!
Mary
10 comments:
Will you show us a photo of the window with the envelopes hanging, pretty please :). I love your envelopes, All the stiching and the heart on the front is so precious. They would look cool made out of a vintage hanky too.
What a sweet idea! I had a piece of that wonderful fabric with its 'swag' detail , but in the opposite colour way (cherry red with white spots!) And yes please, a photo of the complete window would be great!
I just found your blog, I live in Columbus and am a craft blogger, as well and can't wait to visit your shop. This is such a cute idea. I'd love to stop by the shop sometime to meet you and say hello! :)
OOhhh! I love it!! I cant wait to see yours at the shop!!
Ooh so cute, thanks for posting the link!
Ohhh, another super cute idea. This id great! Thanks!
Great read, just excellent. Thanks for share.
Valentines Day Love Quotes For Boyfriend
Happy Valentines Day
Super website with a great sharing and amazing stories is ur web.. please keep doing what u do now.. thanks to you, It's a great sharing and really informative.. will keep following ur web. thanks to you and ur great website.
Mahashivaratri 2017 Whatsapp Status
March 2017 Kalnirnay Calendar
March 2017 Hindu Panchang Calendar
IAF Rally
Thank you so much for share such a wonderful information and ideas.The author clearly describe all the parts of the article and we Calendar can easily understand each and every information. Happy Mother's day clipart Quality articles is the vital to welcome the Heart Clipart clients to pay visit the webpage,that's what this site is giving.
Post a Comment