Showing posts with label gifts. Show all posts

Thursday, December 6, 2012

Emily wraps it up and takes us out

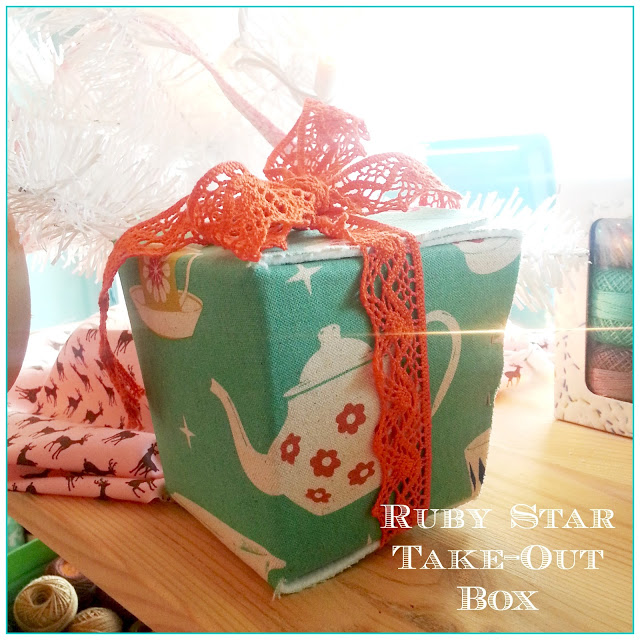
Emily's blog, The Boy Trifecta, is the final stop on our Wrap-Along blog hop. Today she's posted her projects made from the brilliant book...Ruby Star Wrapping!


Emily crafted the Take-Out Box and The Gift Card Truck Softie... 2 seriously cute packages anyone would be ecstatic to receive! Check it all out here:

Now comment away 'cuz TOMORROW IS GIVEAWAY DAY!!!

You can comment on one or all of  the daily posts. Please comment once per post and please be sure to include your email address or change your settings so you are NOT a No-Reply Blogger. We will randomly choose the post and comment # to get our winner!

Wednesday, December 5, 2012

Wrapping some more with Ericka!

Our friend Ericka of Low Beam Studios posted her Wrap-Along projects today! She and her daughter wrapped more Plucky Pantry Boxes and added  felt flowers and a button closure to this one..


She also stitched up a few gift bags, all coordinating. Pretty fun!! Check it all out on her blog: http://lowbeamstudios.com/2012/12/05/ruby-star-wrapping/

Leave us a comment for the Ruby Star Wrapping GIVEAWAY!!!

Thursday, November 29, 2012

Kara Wraps and ReUses

Kara of Me and Elna helps us continue our blog tour wrap-along.. sharring ideas from Ruby Star Wrapping! She made a few bags and repurposed old containers for cute, thrifty and fun gift giving. See all of her projects and read all about it on her blog today: http://meandelna.blogspot.com/2012/11/its-time-for-prizes.html

Also today this is the last chance to leave a comment for tomorrows GIVEAWAY!!! But remember even if your #'s not draw another giveaway starts right after this ;)

Wednesday, November 28, 2012

More Wrapping and Crafting with Sew Liberated

Continuing our Ruby Star Wrap-Along..
Meg McElwee from Sew Liberated posted her project today. She crafted this adorable little apple book for her son plus a bag to gift it in (and later reuse for snacks)! Precious! Read more about them and see more beautiful photos over on her blog: HERE!

A book for little Finn - made and photographed by Meg Elwee!

Monday, April 4, 2011

Beautiful woman and gifts for Baby.

As many of you already know we are expecting another shoppe baby. Due very soon (ANY DAY NOW) is my second little girl, Camilla.
With both of my babies I've been so blessed by the wonderfully crafty and talented women in my life. Handmade gifts are the greatest!!

Just last week the ladies of the shoppe took me out to one of my favorite local restaurants for a before baby dinner. We sat and ate and shared stories about birth and they gave the most gorgeous gifts for baby!


Janelle, who arranged the whole evening, made a sweetly embroidered sack that held precious knit baby leg warms to warm her chubby baby legs this fall

Emily made the baby fun nesting baskets that the big sister is already trying to claim! She says the baby can carry the littlest ones and she'll carry the bigger two and they'll go shopping! :)

Sheila gave us those supper cute patchwork blocks, that Aelyn is also playing with, stacking up and knocking down. I can see my two girls having lots of fun with these... AV says she'll teach the baby how to build. 


And Mary made us the fox quilt I've longed for since seeing her first one that now hangs in the shoppe as a sample of the class she teaches.

Thank you all a million times over! If my emotion doesn't come through in this post please know that I cried when I got home and shared your creations with Jeff. You are truly beautiful woman.

My love to you all,
April

Monday, November 29, 2010

April's Mini Matryoshkas


Little two and a half inch dolls, made to spread 
joy and cheer. 
These tiny girls love to be hung alongside the glowing lights of a tree or just carried in your pocket
strung amongst your keys. 
They're happy to be anywhere that they'll be smiled upon and praised. 
So sew some up for yourself and friends, and have 
Happy Holidays!


What you'll need
several colors of felt including skin toned felt for the doll's faces (I like to use 2 shades of the same color for the body of my dolls)
fabric marker or chalk pencil
pink (rosy) colored pencil
hand sewing and embroidery needles
applique pins - optional
fabric scissors (a small sharp pair helps greatly with the detailed cutting of little things)
paper scissors
clear, fast drying fabric glue like "Unique Stitch"
thread to match felt for doll body
black pearl cotton or floss
hair colored pearl cotton or floss
other bits of pearl cotton/floss to sew on flower embellishments
6 inches of complimentary yarn (or floss) for hanging
fiberfill/stuffing


How to make one:


First print and cut out all pattern pieces.


Choose the colors for your Matryoshka's hood, back and tummy. 


Next, you can either trace your pattern pieces onto the felt with a fabric marker or pencil, or you may opt to use itty bitty applique pins to pin the pieces down and cut around them. I use both methods depending on the pattern piece's shape and size.


Cut out you doll's face, hood, tummy and back of body. Be sure to mark where her hood overlaps her tummy piece.


Apply a tiny amount of glue around face and top edge of tummy. 

  Front view        -       Back view

Glue her face behind her hoods opening and then line hood up with the top of her tummy (along overlap line).


While the glue is drying choose and cut out your flower design. Feel free to play around and come up with your own flower and leaf combinations.

Click on photos for a larger view ;)

Attach your flower design to your doll's tummy. I use a single straight stitch to attach my leaves and either a french knot or cross stitch in the center of my flowers.


After the glue has dried, using a single strand of coordinating thread, take some small stitches around the base and opening of the hood, to secure your gals face and tummy.  


Next using a double strand of hair colored pearl cotton or floss, satin stitch her hair. Use the pattern as a guide for placement and stitch slightly under the hood as you go, so as to avoid any bald spots.


Now mark eyes, lashes and mouth placement and stitch with a single strand of black pearl cotton/floss. Use a twice wrapped french knot for the center of her eyes and straight stitches for her lashes and mouth. Draw on your doll's blushing cheeks with your pink colored pencil.  


On the back body piece, using a large needle, pass the 6" of yarn, knotted at the end, through center of felts loft and come up at the top of your dolls head, this will secure your dolls hanging loop, but you should not be able to see the stitch from the doll's back side (see photo bellow).

Wrong side/ inside doll    -     Right side/back of doll

Draw needle back through the center of the felt and out next to your original knot. It helps to hold the felt at the doll's head secure between two fingers as you do this, and you may need to reshape the felt a bit at the needles entry point. Knot the yarn an inch from the end, trim off excess and pull loop taut.  


Sandwich the two body pieces together.


Starting at the bottom right corner of your little lady's body, blanket stitch her front and back pieces together using a single strand of coordinating thread. Stop at the opposite corner, leaving the bottom open.


Stuff firmly. Use the end of your pencil to help push stuffing into her head and body.


Finish by closing her up with blanket stitch across the bottom.


Yay!! 
You've made a sweet little dolly to hang from your tree or anywhere that brings you joy.
Now make some more and give them to your friends. Everyone is sure to delight in their delicate cuteness!


Happy crafting! 
Lots of love, 
April

Friday, October 1, 2010

Coveted Classes

Classes at Sew To Speak have grown by leaps and bounds since we first opened our doors. This is a wonderful product of both amazingly talented teachers and charmingly enthusiastic students, some of whom are just starting out and many others that keep coming back for class after class. It is obvious to me that these classes are playing a vital role in the development of our ever-growing sewing community!


That being said, we have (as usual) a jam packed schedule this fall. There are many new classes such as the gorgeous Collette Lady Grey Coat with Heather Riegle (modeled above by its lovely maker). This  picturesque piece is a "short wrap coat with princess seams, perfect for between seasons". Also new to list is the Single Girl Quilt class with Mary Dugan, the Modern Diaper Bag with Pat Wax, the Jump Rope Dress (pattern by Oliver & S) with Amanda Sasikirana, and the Baby Gift Set Class with Michelle Thomas. This three piece set (shown below) is perfect not only for shower gifts but also for anyone with one or more little ones on their list this coming holiday season.


Of course we're also very pleased to continue offering our most popular and coveted classes, like Michelle's Intro to Machine Sewing, Intro to Appliqué and Embroidery with April Rhodes, and Quilted Stockings with Mary (picture below).  You may think its early for this Christmassy class, but last year we couldn't schedule enough of them and had a continuous wait list. This year I've heard lady's sharing how they will be taking it early to ensure they have time to make several as gifts before the holidays are here. Other favorites back on the roster include Personal Fit with Sheila Brex, the Barcelona Skirt with Pat, and the Anna Tunic with Heather and more.

You can read about all of the classes mentioned and several others here, as well as veiw the dates and times they are offered. Call or come in to sign up, 614 267 3011.


Happy Autumn weekend to you all,
April

Saturday, September 19, 2009

Divided Envelope Clutch

*the divided envelope clutch pattern has been fixed, sorry to anyone who was unable to download it previously*

Hello blog friends...
Happy first day of Fall.

I thought I'd send a little project your way in case your looking for something quick, simple and satisfying to sew.


This is my Divided Envelope Clutch.

I designed this simple clutch some time ago and the first one I made was used for housing a few diapers and a small case of wipes for short outings/errand running with little one in tow. It's my strong belief that stylish accessories make all chores more fun. The size is just right to be carried alone or slipped into a larger purse while running out the door.

Recently, I shared this project with a clever friend who adapted it to fit her own needs by simply changing the scale of my pattern. "Ahhhha" I thought.  The possibilities of this silly little diaper clutch suddenly became endless.  Its design would be great for all kinds of uses. Shrink it way down for a cute little wallet, or enlarge it for a laptop sleeve.  I made the one in this post to carry coupons and a grocery list. And I have another in pieces on my sewing table,  sized it specifically to hold scissors and combs. It's to be a gift for my hairdressing sister in-law.

The size is easily rescaled to suit whatever your use may be.

Here's what you'll need:

1/3 yard* of fabric for exterior - I used Alexander Henry's Apples & Pears in Brown
1/3 yard* of fabric for interior - I used Kaffe Fassett's Spots in Red
1/3 yard* decor bond
spool of coordinating thread
fabric marker on chalk pencil

*you will need more if you decide to enlarge your clutch.


Here's how it's made:


First open, download and print the pattern (and if you wish to rescale simply print or copy at whatever percent you like i.e. 50%, 75%, 150%...)

Next Cut all pieces.

First cut your 3 full pieces on the fold; one from exterior fabric, one from interior fabric and one from decor bond. Using a fabric chalk or marker, transfer dots onto large exterior piece.
Then fold pattern at dash-line and place on fold and cut one from exterior fabric, 3 from interior fabric and two from decor bond.

Iron decor bond onto wrong-side of both exterior pieces and one small interior piece.


Next with right-sides facing attach the small exterior piece to one of the small lining pieces (without decor-bond) by sewing across the top with a 1/4 seam-allowance. Press seam open, fold right-sides out and press flat.
Do the same with the small lining piece w/decor bond and remaining small lining pieces. This will be your interior divider.

Now with right-sides facing attach the two larger pieces. Sew across rounded top from one dot to the other with a 1/4" seam-allowance. Clip along this top seam-allowance every few inches, being sure not to cut into your stitches.


Turn right-sides out and press well. 


Lay out pieces (as shown bellow). Start with largest piece first, lay exterior side up, next lay smaller exterior piece, exterior fabric facing down, finally place interior dividing piece on top.

Pin together and sew around all three sides with a 1/4" seam-allowance. Carefully trim seam-allowance to 1/8th inch.
Turn exterior sides facing out. Press neatly.

Have fun choosing a button.  I couldn't choose so I combined two :)


 Finally, stitch your buttonhole and sew on your button.


Now go out and enjoy. 

Till next time - ;) April 

Wednesday, March 11, 2009

Party Preparations and New Goodies too!

Hello shoppe blog sewer friends,
It has been nearly a month since my last post. I haven't meant to be neglectful, I've just been busy busy busy. Between trying to help out around the shoppe while simultaneously chasing baby, sewing feverishly through nap time, enjoying time outdoors, and trying not to be too neglectful of my housework and sweet husband, the blog just slipped onto the back burner for a bit.
But now I'm here, excitedly typing, because there are such wonderful things to announce.

First PARTY time is less than four days away!
Our Birthday Celebration is this Saturday, March 14th, from 11-5! Stop in to put your name in the jar for our "every half hour" prize drawing. Your name will stay in the jar all day so you don't have to be present to win! The prizes are awesome and I must say I'm almost jealous because being the daughter of the shoppe owner renders me disqualified to win (but don't worry about me, I get my perks too:} ).

Second, yesterday we received a wonderful shipment of NEW goods.

Two beautiful New books, hot off the press...

Heather Ross' new book "Weekend Sewing". Gorgeous, fresh and inspirational with stunning photography. This book is filled with great projects including many lovely dresses! and comes with patterns!

Sewing Green by Betz White is all about inspiring us to reduce our waste and reuse what we have. Amazingly creative, with diverse projects, her book includes templets and patterns. This lady breathes new life into ideas that have been around for decades. She shares ways to save money while not sacrificing a bit of style.

Several fun New Japanese treasures. Fabric from Kokka as well as some beautifully made Japanese trims...
This kitty print has the sweetest salvage edge I've ever seen!


Japanese trims are in limited quantities so get them while they're here:)


and New Oliver&S patterns...

adorable spring looks for both boys and girls, more designs not pictured.

Also, we have some new Alexander Henry fabrics recently , a couple lovely new patterns for little girl attire by an awesome indie designer called Sugar City and tons of fun new shoppe samples as well as gift ideas for all ages.
So come party with us, bring your friends and your little ones, it's gonna be fun fun fun and the weather should be nice too... We can't wait to see all of you!
Until next time-
April.