Showing posts with label sewing projects. Show all posts

Friday, April 8, 2011

Springy Stash Buster


Sewn or not.. pennants are a super simple and springy stash buster. Inspired by a lovely customer and fellow blogger, Erin, I first made this small one for our front window and then set out to make another for above the fireplace. They go together quickly and are just so cheerful that I really want to sew some more! I think it'd be fun to string them around Aelyn's bunk bed, above the kitchen sink or across the front porch...  I wonder how many I could complete before the baby comes??

For more bunting/pennant inspiration and tutorials check out these blogs:

Bloom - No-Sew Pennant Banner Tutorial

Joyful Abode - how to make a Bunting

The Mother Huddle - No sew bunting using vintage handkerchiefs


Monday, November 29, 2010

April's Mini Matryoshkas


Little two and a half inch dolls, made to spread 
joy and cheer. 
These tiny girls love to be hung alongside the glowing lights of a tree or just carried in your pocket
strung amongst your keys. 
They're happy to be anywhere that they'll be smiled upon and praised. 
So sew some up for yourself and friends, and have 
Happy Holidays!


What you'll need
several colors of felt including skin toned felt for the doll's faces (I like to use 2 shades of the same color for the body of my dolls)
fabric marker or chalk pencil
pink (rosy) colored pencil
hand sewing and embroidery needles
applique pins - optional
fabric scissors (a small sharp pair helps greatly with the detailed cutting of little things)
paper scissors
clear, fast drying fabric glue like "Unique Stitch"
thread to match felt for doll body
black pearl cotton or floss
hair colored pearl cotton or floss
other bits of pearl cotton/floss to sew on flower embellishments
6 inches of complimentary yarn (or floss) for hanging
fiberfill/stuffing


How to make one:


First print and cut out all pattern pieces.


Choose the colors for your Matryoshka's hood, back and tummy. 


Next, you can either trace your pattern pieces onto the felt with a fabric marker or pencil, or you may opt to use itty bitty applique pins to pin the pieces down and cut around them. I use both methods depending on the pattern piece's shape and size.


Cut out you doll's face, hood, tummy and back of body. Be sure to mark where her hood overlaps her tummy piece.


Apply a tiny amount of glue around face and top edge of tummy. 

  Front view        -       Back view

Glue her face behind her hoods opening and then line hood up with the top of her tummy (along overlap line).


While the glue is drying choose and cut out your flower design. Feel free to play around and come up with your own flower and leaf combinations.

Click on photos for a larger view ;)

Attach your flower design to your doll's tummy. I use a single straight stitch to attach my leaves and either a french knot or cross stitch in the center of my flowers.


After the glue has dried, using a single strand of coordinating thread, take some small stitches around the base and opening of the hood, to secure your gals face and tummy.  


Next using a double strand of hair colored pearl cotton or floss, satin stitch her hair. Use the pattern as a guide for placement and stitch slightly under the hood as you go, so as to avoid any bald spots.


Now mark eyes, lashes and mouth placement and stitch with a single strand of black pearl cotton/floss. Use a twice wrapped french knot for the center of her eyes and straight stitches for her lashes and mouth. Draw on your doll's blushing cheeks with your pink colored pencil.  


On the back body piece, using a large needle, pass the 6" of yarn, knotted at the end, through center of felts loft and come up at the top of your dolls head, this will secure your dolls hanging loop, but you should not be able to see the stitch from the doll's back side (see photo bellow).

Wrong side/ inside doll    -     Right side/back of doll

Draw needle back through the center of the felt and out next to your original knot. It helps to hold the felt at the doll's head secure between two fingers as you do this, and you may need to reshape the felt a bit at the needles entry point. Knot the yarn an inch from the end, trim off excess and pull loop taut.  


Sandwich the two body pieces together.


Starting at the bottom right corner of your little lady's body, blanket stitch her front and back pieces together using a single strand of coordinating thread. Stop at the opposite corner, leaving the bottom open.


Stuff firmly. Use the end of your pencil to help push stuffing into her head and body.


Finish by closing her up with blanket stitch across the bottom.


Yay!! 
You've made a sweet little dolly to hang from your tree or anywhere that brings you joy.
Now make some more and give them to your friends. Everyone is sure to delight in their delicate cuteness!


Happy crafting! 
Lots of love, 
April

Monday, July 26, 2010

Made Monday

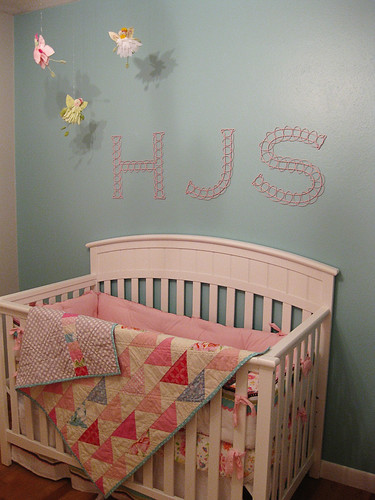
Sweet baby Harper's nursery

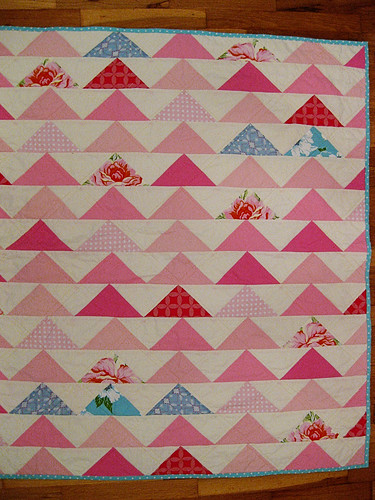
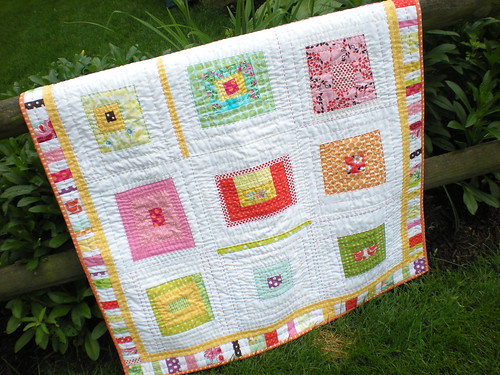
A sweetly subtle baby quilt in pinks and blues, made by Sam VanDerPuy. Pattern from the book Denyse Schmidt: Quilts
  
Harper's quilt


Monday, June 28, 2010

Monday, May 24, 2010

Monday, May 10, 2010

Friday, May 7, 2010

Hooded Baby Towel and Wash Mitt


This relatively easy to sew duo would make a lovely handmade gift for a new baby or expecting mother.  Plus they're also a perfect chance to practice your bias tape binding skills! 
Place the set in a sweet basket along with my very favorite baby soaps and it's certain to be a cherished receiving gift. 

This new 100% cotton, terry velour fabric is so soft and cuddly that it almost makes me want to have another baby just so I can snuggle him or her inside it...
...yeah I know, I'm constantly debating another baby. Oh, those tiny little fingers and toes... and adorable little animal prints, cuddly fabrics and cute baby projects are so tormenting. They certainly help to tally up the pro's column in the poll I take in my mind.

Come to think of it, I have been oohing and ahhing over other peoples babies quite a bit lately, perhaps because mine is turning into such a big girl! :(  Don't tell her I said so though. She's really into being small right now. She's constantly saying "I'm tiny" and I say "Yes, you are. You're my tiny girl." 
She's still my baby. She still lets me rock her and snuggle her. 
I tell her she'll always be my baby, just like I remember my mother telling me. And she will be, just as I am. 
And we'll all be our mothers babies in someway, no matter how big (or old) we grow.

Happy Mothers Day.


Here's what you need: 
*1 1/2 yards of 60" wide terry velour by Spechler Vogel, this is enough for 2 towels and a mitt
One fun fat quarter, cotton print or a large enough scrap to cut an 11x11x16" triangle.
130" of bias tape or 1/2 yard of fabric to make your binding (since the towel has no curved edges I did NOT cut my tape strips on the bias, this saves both fabric and energy).
Coordinating thread
A rottery cuter, acrylic rule and cutting mat
Fabric shears
Pins 
and a sewing machine
+ scrap paper and pen for drafting your Wash Mitt templet


Here's how it's made:
The Towel


Select you fabrics. For this project I've used a 100% cotton, extra wide terry velour material from Spechler and Vogel. It is wonderful because the terry side is nice and absorbent while the velour side is oh, so cuddly!! Also for this towel I've used a fun hedgehog print and a red gingham flannel, both from Michael Miller.

First: Cut a 30"x 30" square from your terry velour; if you are using the 60" wide terry you can cut it straight down the center fold, then cut two 30" squares at once. Do to the salvage edge you may not end up with an exact square, as long as it's close it wont be noticeable.


From your printed cotton cut an 11"x11"x16" triangle. Pay attention to the direction of the print. I've made my 16" cut across the fabrics grain and two 11" cuts on the bias so that when the hood is up the hedgies aren't slanting sideways. 


Cut another 11"x11"x16" triangle from the terry.


Next with velour side up place your printed triangle face down on top. This way you will end up with a hood lined in extra soft velour, to be nice and gently on new baby skin. Pin bottom edge and stitch with a 1/4" seam allowance. Turn right sides out and press.


Trim off any little triangle tips that stick out or any other discrepancies between the two triangles. Then topstitch, a 1/4" from edge, along the bottom of the hood. 


Next aligned the hood with one of the towels right angles and pin.


Baste in place.


Trim any discrepancies.


Prepare binding.


Attach bias tape with mitered corners. Save you extra bias tape.


Trim out balk seam allowance around hood to allow the tape to neatly encase the raw edges. 
Finish your binding with the final topstitch, take your time neatly forming your mitered corners and making sure all raw edges are tucked in and well encased, if they are not fraying and unraveling might accrue during washing. Save you extra bias tape.


The Wash Mitt


First onto a scrap piece of paper, trace a rounded mitt shape about 2" away from your hand all the way around. Note the mitt I drew here was only an inch larger then my hand and it fits very tightly. 2" extra fits much better :)


Cut mitt shapes from your left over terry cloth.


Place velour sides together, terry sides facing out, pin and stitch 3/8" from edge, leaving bottom open.


Trim seam allowance to about 1/8"-1/4", being careful not to get too close to your stitches. Turn velour side out and stitch another 3/8" from edge.


Using the extra binding tape from your towel, begin attaching it to the open end of the mitt. First fold the sort raw end of the tape back and then pin around the perimeter, sew. 


Take about 4" of tape, top stitch closed, then fold length wise to make a loop. Stitch short ends together.


Turn mitt right (terry) side out.


Pin loop close to one of the side seams (but not all the way at the side seam to avoid too much bulk). Finaly fold binding over raw the edges and topstitch to finish.


Happy Sewing and lovely weekends to you all!
Snuggle your babies once for me,
April